Monday, August 02, 2010

This last week got a little busy, and I wasn't able to post. However, this last week started my fiber experimenting as well.

Good morning Monday! And what do we have here. Is that a 2x2' box on my doorstep, full of luxurious Alpaca fibers? I think it is!


What I have here in my magical box of glorious wonderment is fiber from 4 huacaya alpacas. There are two breeds of alpaca that are generally bred for fiber: huacaya and suri. The main difference between the two is in the fiber. Huacayas have a crimpy fiber that has a lot of stretch to it. Suri alpacas have a straighter, silkier fiber that naturally grows in locks, making the suri alpaca look like it has dread locks.

Huacayas make up the majority of alpacas bred for fiber, so if you get alpaca fiber, unless the seller specifies where the fibers come from, you can rest assured that you will be getting huacaya fiber.


So... What do I do with this HUGE box of fiber now?

I have two choices. I can wash the wool first or I can spin the wool and then wash the yarn later. Both of these options are workable. Alpaca fiber does not contain lanolin, the substance which makes sheep wool oily and difficult to work with. However, I will choose to wash the fiber first. Sometimes, if you wait to wash the fiber, some dirt will remain caught in the twisted fibers.

The method of washing I chose is as follows:

1. Fill up one side of the two-basin sink with hot water and a squirt of dish washing liquid. Make sure it is well mixed. Soak the fibers for 10 minutes, making sure all fibers are wet. Do not agitate, as this will cause the fibers to felt.

2. Fill the second basin with hot water and mix in a half cup or so of vinegar. Once the fiber has soaked in the first basin for ten minutes, remove it, squeeze out the excess water, and soak it in the vinegar mixture for 10 minutes.

3. Empty your first basin, fill it up with clean hot water. You may add a small amount of hair conditioner (the same you use on your hair) but it isn't necessary. Once the fiber soaks for 10 minutes in the vinegar, squeeze the water out and soak it in the plain/conditioned water for 10 minutes.

4. Remove the fiber and squeeze out excess water by hand. Place the fiber on a towel, roll and squeeze to remove as much excess water as possible.

5. Lay the fiber out on a screen to dry. I removed one of the screens from my window and lay it across two chairs. This works perfect and the fiber shouldn't be heavy enough to bend the screen.
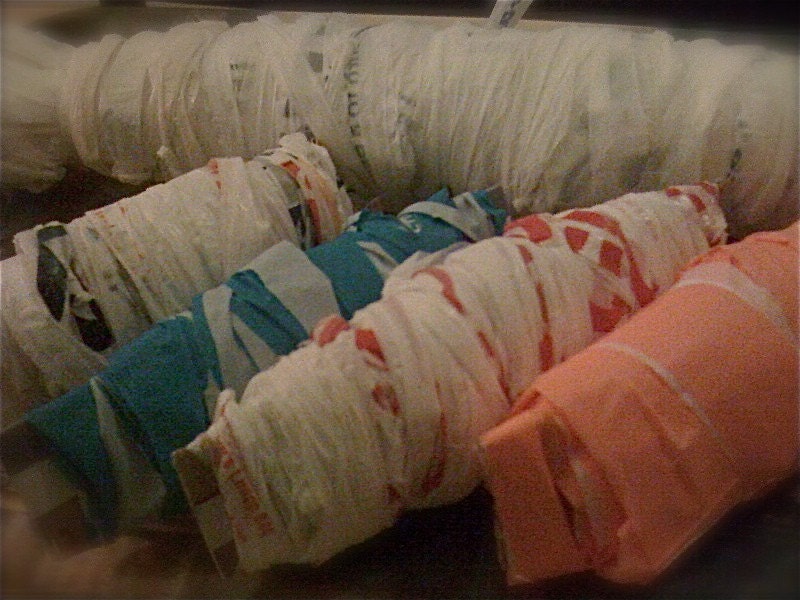
Tada, washed fiber!

Once that dries, you are ready to card!


Carding is the process by which you align the fibers. This makes it easier to spin, though some very good spinners can spin from the lock (straight from the fleece).

There are two main processes to align fibers: carding and combing.
Combing uses a set of combs, one which has two sets of teeth, which not only aligns the fibers, but also separates the shorter fibers from the longer fibers, which are better for spinning.

Carding uses two metal-wire curved brushes to align the fibers by passing the fibers back and forth between the brushes. In this case, I purchased two dog brushes that are curved and work just as well.

Once the fibers are aligned, the resulting pads of fiber can be used to make roving or can be used for straight spinning. For my purposes, I will use them straight for spinning.

At the point where you card the fiber, you can also blend other fibers. This is an exciting and artistic moment in your fiber work.

I purchased a small amount of bamboo fiber (also known as bamboo rayon, because it is processed in the same way as rayon) to blend with my alpaca fiber from Fiber Lady. Bamboo is a very slick, shiny fiber. It does not have the barbs that the alpaca fiber has, and as a result, does not felt. It has a smooth texture, similar to silk.

When blended with the crimpy alpaca fiber, it adds a sheen and smoothness to the strength and warmth of the alpaca fiber.

You can choose to partially blend, so that you have streaks of color in the fiber, or fully blend, which will make the fiber a uniform color.

Now it is time to start spinning! I've carded a lot of straight alpaca and have created an alpaca bamboo blend. Next week, I will share the joys of spinning these fibers!

Wednesday, July 21, 2010

So, what's with the fiber? Part I

I hate to admit, I have always been a little bit of a cheapscate when buying yarn for myself. Though I have been a crocheter most of my life and have, in the past, dabbled in spinning, felting, and other fiber arts, I have never been the person to drool over expensive wool blends. Recently, I have, however, taken an interest.

Recently, I have had the opportunity to work with a very interesting blend: quiviut down (musk ox), merino, silk, and baby alpaca. This wonderfully soft blend can be found at www.CottageCraftAngora.com. This blend is very soft, though I'm not sure I can drool over it yet. I am certain it is drool-worthy, but I'm not sure why it is drool-worthy.

So I begin my journey to discover, what's so awesome about fibers.

Question 1: What is fiber?

This is pulled directly from Wikipedia:

"Animal fibers are natural fibers that consist largely of particular proteins. Instances are silk, hair/fur (including wool) and feathers. The animal fibers used most commonly both in the manufacturing world as well as by the hand spinners are wool from domestic sheep and silk. Also very popular are alpaca fiber and mohair from Angora goats. Unusual fibers such as Angora wool from rabbits and Chiengora from dogs also exist, but are rarely used for mass production.

Not all animal fibers have the same properties, and even within a species the fiber is not consistent. Merino is a very soft, fine wool, while Cotswold is coarser, and yet both merino and Cotswold are types of sheep. This comparison can be continued on the microscopic level, comparing the diameter and structure of the fiber. With animal fibers, and natural fibers in general, the individual fibers look different, whereas all synthetic fibers look the same. This provides an easy way to differentiate between natural and synthetic fibers under a microscope."

What makes fibers course or soft, fluffly or silky, is determined by the thickness of individual fibers as well as by the structure of the fiber.

Kara Heinric writes "It turns out that it doesn't matter what a garment is made of, if the fabric contains over 5% of fiber with a diameter over 30 microns, it will prickle or itch. This research also established that once the average diameter of the fiber in a fabric or sweater exceeds 22 microns, the prickle factor begins to appear as well." (http://www.neaoba.org/)

In addition to the width of fibers, the structure is important to how a fiber feels.

This image shows wool and other fibers under a microscope.


As can be seen, the outside of the fiber is scaled. These scales are the reason that some fibers create felt when agitated. The scales catch on other fibers, hooking them into place.

To aid me in my experimentation, I have purchased 5 lbs of raw alpaca fleece from Wine Country Craftsman (http://winecountrycraftsman.com/). I expect it to arrive by Monday. :) Over the next few weeks I will catalog my progress with the alpaca fleece and include a lot of additional information about fibers and why they are awesome.

Monday, July 12, 2010

How to Felt Soaps

Felted soaps are a wonderful addition to any bathroom. They are great gifts to include in gift baskets or as a gift on their own. The wool covering makes the soap its own washcloth and offers gentle exfoliation.

You will need:

one nylon knee high or stocking
wool roving in your favorite colors
soap


Wool roving can be found in most craft stores, or there are many independent sellers who offer a variety of wools and other natural fibers that would work for this project.

Though any soap can be used, I suggest using a nice hand-made soap. Glycerin soaps work well for this sort of project and can have a number of wonderful additives, such as goats milk, lavender, essential oils, oats, etc. Most important, use a soap that you love!

1. Wrap the bar of soap in the wool roving

This can be done with any color or colors that you want to use. Try to wrap the wool tightly and aim for an even coat, around 1/4" thick.

2. Place the wool-wrapped soap into the nylon knee high.

This will keep the fibers together as your start the felting process. If the stocking is too long, try tying off one end so that the stocking forms a small pouch.

3. Wet the soap bar with warm water

Over a sink or bucket, wet the soap in the stocking with warm water. Do not keep it under the water during the felting process.

4. Rub the soap

For 10-15 minutes, rub the nylon packet between your hands. Try to keep even pressure. The combination of heat and friction causes the fibers to lock together, creating felt.

If the wool is still too loose (not felted enough) continue to rub the packet until you get the desired consistency.

5. Remove the soap from the nylon and allow the felt to completely dry

At this point, the soap is ready to be used. However, if you want to needle felt a design onto the soap, you will need to let the soap completely dry.

Needle Felting

To create detailed designs on the soap, you will need to needle felt them. This is a little more complicated. You will need a felting needle and additional wool roving. This is the tool I personally use. For more detailed work, however, you will need to use a single needle without the fancy tool.

Take a piece of wool roving and shape it vaguely like what you want the design to look like on the soap. With your single needle, push the needle repeatedly through the wool roving into the soap, but not all the way through. As you repeatedly stab the soap, you can shape the new wool until you have your desired design.

Be VERY careful. Felting needles are extremely sharp. They have a barbed shaft and an extremely sharp tip. I speak from personal experience when I say that stabbing yourself with a felting needle is very painful.


Check out these cool Etsy shops that sell beautiful felted soaps!

Lovely citrus shaped soaps from Engelfelt

Felted rose on chocolate soap by SoFino

Monday, July 05, 2010

Post-Holiday Recovery

Well, the showcase promotion went fairly well. Got some new store hearts and one sale. The hearts are the important part, really. Sometimes people forget that the point of advertising isn't necessarily to get an immediate sale but to build up a customer base. :)

The 4th of July here in America has come and gone. The fireworks are done and the smoke has cleared. Oh boy! And now we get to relax. I don't know about anyone else, but with having to travel four hours to vist my folks, eating out at busy restaurants, watching the fireworks and the soldier show on the military base, hitting the holiday sales at the mall, dealing with family, and driving four hours back, I am worn out!

So what is the first thing you do when you get home and finally have some time to unwind after the holiday?

Here are a few great post-holiday recovery creations you can make. Some of these, you can prepare before the holiday and have them ready for when you get home, though be careful to remember that any scrub or mask that contains fruits, vegetables, or animal products like milk or eggs, will have a shelf-life and could go bad if left too long without use. It may even need to be refrigerated.


Quick and Easy Salt Scrub

1/4 cup course pickling salt or kosher salt (or Turbinado sugar if you have sensitive skin)
1/4 cup baby oil or mineral oil
1 tsp dried tea leaves
1 tsp dried mint
4-5 drops mint extract

Mix this together in a jar with a lid. The salt or sugar may settle some, which is okay. Just mix the scrub with a spoon before use. The mint will refresh you while the salt or sugar gently exfoliates your skin. Feel free to try other things into the scrub, such as honey, vanilla extract, and any sort of essential oils. Almond oil, coconut oil or other oils could be substituted for the baby or mineral oil. Just try some things until you have a mixture that speaks to you. If you are using the above recipe, you can prepare it before you leave for the holidays, since none of the ingredients will go bad.


Check out Make Your Cosmetics for some more great ideas!


Joe's "Skittles Drink"


My boyfriend who is a connoisseur of alcohol, devised this wonderful drink he dubs "Skittles" because it tastes just like skittles. He also claims it is a liquid panty remover, but I call shenanigans. At any rate, it is very tasty and great for relaxing during your post-holiday recovery.

1 part raspberry vodka
1 part sweet & sour mix
2 parts sprite
Cherry to garnish


Etsy Feature Products for Post-Holiday Relaxation!

Now that you've had a relaxing hot shower with your scrub and a few drinks, why not check out a few items from Etsy to help you relax!

Check out the scented and uncented eye pillows from jodikay.

Fizzy bath bombs by myotherprincess

Legal Highs Herbal Tea/Relaxing Smoke by NOTWeeds is also an interesting item for those of you who smoke or drink tea. :)

Tuesday, June 29, 2010

Self Promotion and a Great Recycling Project!

Self Promotion

Today, Wednesday June 30th, I am in the jewelry showcase on Etsy. This is a great opportunity for me to sell some of my new polymer clay pieces.

I did a pattern showcase a while back, which got me a lot of item views, but no purchases. We will see how it goes with this showcase. If I manage to sell an item or two, it might be worth it, but otherwise, I'm sure I can find more effective advertising measures. I have not done any craft shows yet, but if I can get a really good supply of items made and some ideas for a table, I might do that as well.


Great Recycling Project!


Plarn is plastic yarn, or yarn made from recycled plastic bags. It is great for making rugs, reusable shopping bags, drink coasters, and other great crafts. The image is some plarn made by CharmingClassicality

This video explains how to make plarn! - How to make plarn!

Because plarn is made from plastic, it generates static electricity, which traps dirt and dust. This is great for an entryway mat to help keep from tracking dirt from the outside in. Rugs can be hosed down and dry quickly, making them easy-maintenance.

Plarn can be combined with traditional yarns to add color and texture. This also adds to the life of your finished product!

Try one of these crochet projects with your stash of plastic bags!:

Plarn Satchel

Circular Plarn Rug

Plarn Soap Dish

HINT! - If you are looking for something more colorful and don't have any pretty colored plastic bags, try purchasing some surveyors tape!

Welcome to the Crappy Crafter Blog

Hello, and welcome to the blog for Luthvarian's Crappy Crafts. I am a library page in the mid-west who has been crafting for most of my life. Recently, I've started and Etsy account. You can find my crafts for sale at http://luthvarian.etsy.com.

I also have a FaceBook page found here.

I have a few goals for this blog:
  • Showcase great crafts I find from other individuals
  • Describe fun new projects for you to try and offer "how-to" tips
  • Describe some of the interesting crafts I have in the works
I intend to update at least once per week. Right now, I am still in graduate school, getting my MLS in library science, and with work as well, I don't want to overextend myself. However, in the future, I may increase my posts.

Please feel free to follow me as I share my love for creation!